- New - A guide to making a Pistol/Gunslinger Build
- New - A guide to making a Melee Build
- New - Scav Magazine - All locations and details
- For New Players - Read the walkthrough.
- New - Open Season
- New - Power Play Quest
- New - Raider Outposts
- New - Nuka World Endings Guide - Options and Benefits
- The Grand Tour
- Faction Perks and New SPECIAL Ranks in Nuka World
- Gage (Companion)
Fallout 4 Tips
Combat, Settlement, Inventory, and Gameplay Tips
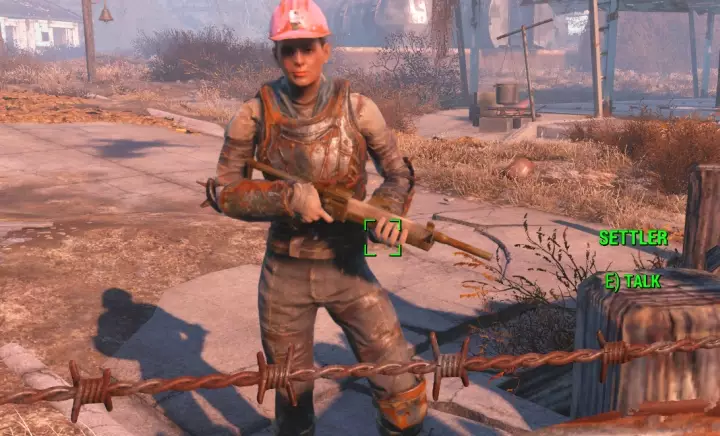 You can give Settlers better equipment, improving their survivability - this is why you have full access to their inventory. Give it to them, then select 'Equip'. They have the same gear slots you do, so don't be surprised if they're in their underwear with some chest armor on. Giving them under-armor is helpful to keep appearances up. Named NPCs normally cannot die, but your population can be killed off by Raiders. Make this less likely by giving them hand-me-down armor and consider giving them weapons with good range so they don't run up to a pack of raiders with a switchblade.
Settlements and Managing 'Stuff'
All items in the Settlement's Various Stations are available for Crafting. This means if you go up to one, select Transfer > Store all Junk and want to then upgrade your armor, you will be able to use what's in the stations. They all share the same inventory, but regular containers do not. If it says 'Craft' when you click it, it qualifies for this type of storage.
You can get gobs of Purified Water, a great healing/crafting item - free. The more water a Settlement has over the populations needs, the more purified water will be deposited every few days into the Settlement's inventory. Take it out and use it for normal healing post-combat, while saving Stimpaks for the thick of combat as they work much faster and heal a set percentage.
Cook! There are cooking stations for a reason. - Don't just eat raw Radroach and Molerat meat, cook it. By cooking things, you can remove or reduce the Radiation. Radiation is dangerous to your health. All recipes are revealed to you right away, so you can see what vegetables you might need to make a good post-apocalypse stew.
You can change the fast travel destination in your Settlements. Find this under Resources > Miscellaneous. Each Settlement can have only one, but it helps to put it outside your crafting area so that you can avoid walking to get there, and quickly dump junk whenever you are visiting. Very handy if you've used a drug to get extra scrap home and find yourself overencumbered because the effects wore off.
Junk does not need to be broken down. If a desk fan is in your Settlement's crafting inventory, then when you need screws it will automatically be broken while providing the leftover resources to the stockpiles. When you go to craft something, if you see you have 30 screws it is counting the screws inside unbroken components, so you always know how much of a resource is available to you for crafting.
Take the Core out of your Power Armor by Transferring it. This will prevent theft by raiders. You should know you are able to fast travel and Power Armor DOES function without a core, just not very well - but normal NPCs just don't want it without one. Your Power Armor's location will always be displayed on the map.
Rename Weapons - after upgrading them, the names can get rather convoluted. Name it something you like, or let it start with the ammo type (10mm upgraded pistol) so that it will appear higher in the list for stat comparison when you find something new. You can rename weapons and armor while crafting them.
While at upgrade crafting stations, you can scrap unneeded weapons and armor. This means leather isn't in as short supply as you probably thought, and makes it much easier to upgrade gear to have better stats. The Pocketed upgrade is great early on. Arms and Legs give 5 (if I recall) while chest pieces give 10 extra carry capacity. When you're done, be sure to check that store all junk is done.
You can sort by weight while looking through your inventory. This can help you ditch things when you're overencumbered and unable to fast travel. Be selective in what you loot from raiders. You do need leather, but one only needs so many pipe pistols.
Give Settlers something distinctive to aid you in managing them - whether it's just giving them armor to wear, bandanas, helmets - something - you can easily tell if a new Settler is in town by their lack of this gear. It doesn't have to match at all, since most Settlers will be wearing normal clothing and lack a hat. Notice the new Settlers and assign them to something. More food, guards, or scavenging stations.
Character Building
Lone Wanderer is a Great Perk for now - This is a widely known bug where Dogmeat can still be used with this Perk, but no other companion. You'll take 15% less damage and get 50 more pounds of carry weight. I suggest you play with companions and see which you like. If it's none, you really want this Perk.
While on a Quest, if you get full and have recently discovered a new area, return home. There's no need to toss half your stuff. Head home, store the junk and fast-travel right back to where you were. Enemies shouldn't respawn too quickly, so you have time to manage and upgrade before you head back to get more loot!
You'll want at least some of each S.P.E.C.I.A.L. Stat. Click here to see what they do. There are good perks everywhere in the tree. You may have no interest in melee weapons, but the Strength category contains the important Armorer Perk, which can turn you into god late-game with fully upgraded gear. Intelligence and Charisma are not super-useful stats on their own, but you may want the ability to make Supply Lines between Settlements (my full guide to Settlements) or get the Science! Perk that lets you upgraded advanced technology/energy weapons and Power Armor.
Fallout 4 has no level cap. You can get enough Perk Points to get every Perk in the game if you play long enough. This means you don't need to be particularly choosy - it's more about what will help your character most right now than planning for later, though when you need to invest in SPECIAL you do have to accept you won't get a huge gain for a while.
Idiot Savant is always good. This Perk raises XP gains no matter what level your intelligence is, so you do not have to forego good Perks like Chemist if you want to use it. Here's a great reddit post with chart that shows that no matter the level of intelligence, Idiot savant is going to raise your XP gained more than a lone point of Int. So, if you want to level fast take this Perk and enjoy the boost.
Don't overlook Luck. You will find more ammo, caps, and other goodies with a higher luck stat and Critical Hits are incredibly helpful in a tough firefight. This Stat is only worth it if you like VATS play though, the extra caps and stuff you'll find are not worth the points alone. The earlier you get at least 5-6 luck, the sooner you start to really benefit from this. It's not necessary, but very handy.
You can upgrade clothing such as your Vault Dweller's suit, which means you should be on the lookout for even better gear. If you highlight it and it does not have a specific armor slot, it's likely your armor will fit over it - you therefore get 7 total pieces of body gear. Head, Chest, Arms, Legs, and your outfit. This can be improved to give you better protection against radiation, and Rad-Away is not very plentiful early in the game.
Combat
Perception has nothing to do with your accuracy when firing a weapon. The weapon's accuracy rating matters, along with range, but ultimately using the gun and firing in the right direction is up to you. Lower accuracy means a bullet may go wide. You can tell by the sights how likely you are to hit when targeting, as a wide sight means it's possible to miss even if aiming properly - as with shotguns. With a highly accurate weapon with a sniper rifle, if you pull the trigger at the right moment you're sure to hit.
V.A.T.S. is where Perception shines - The 'Q' key on PC will open Vault Assisted Targeting System, where you can select a body part (usually Torso or Head) to take a shot at, with the weapon you're currently wielding. The weapon's accuracy rating, the range, and your Perception all come into play here. It CAN be a melee weapon you use, as well. The chance to hit is displayed. Depending on your action points (determined by agility), you may be able to fire 3 or more times. Each point of agility adds 10 action points. Note that time does advance, so you can be taking damage while in VATS, but it seems to be slowed to 1/5th or 1/10th of normal speed so you can take your time.
Power armor is available early, but you probably shouldn't use it much until later. You'll learn more about gameplay, and have the Power Armor should you face a quest you just can't tackle in normal gear. Power Armor takes Fusion Cores, which are found sparingly early on. Eventually, these will come in abundance and you can begin upgrading your armor.
You control Critical Hits - There are sneak attacks, which do double damage (or more, depending on Perks), but you must be undetected. Depending on your luck, you have a Critical Meter that will gradually fill based on your luck stat. Pressing the jump button when taking your shot in VATS will cause you to use your critical hit, which can instantly take down an enemy and is guaranteed to hit, so long as you have a 1% chance.
When facing Legendary enemies, aim to cripple a limb - Legendary enemies have a ton of HP, so they take time to bring down. You can make it much easier on yourself by taking an arm (or even better) a leg out of the equation. For melee enemies, the arm can greatly reduce their potential damage to you but they can't hit you if they can't walk. Using VATS is good for this - it's better to score a critical hit on a limb when that crit will not bring the opponent down.
More Fallout 4 Guides
Share Tips and Strategies Below
- Raider Outposts in Nuka World
- Nuka World - Play as a Raider in this DLC
- Far Harbor - Learn about the DLC, its secrets, and read walkthroughs
- Automatron - Guides to building bots and quest walkthroughs
- Settlements - An in-depth guide to Settlements and managing them
- Melee Build - the best perks for a melee character
- Sneaking - Learn to be stealthy
- Critical Hits - Shots to Crit and Crit damage mechanics
- Tips for Making a Build - General advice for creating your own build
- Action Points - AP and all the things that affect it
- VATS - all about the V.A.T.S. and AP usage on weapons
- Gameplay Tips - pointers that will help new players
- Making a Sniper Rifle Weapon mod examples. Heavy hitter and fast-firing Comparison - two guns from the same base.
Share Tips and FAQs (9)
Thanks for a great guide.
Join In