- New - A guide to making a Pistol/Gunslinger Build
- New - A guide to making a Melee Build
- New - Scav Magazine - All locations and details
- For New Players - Read the walkthrough.
- New - Open Season
- New - Power Play Quest
- New - Raider Outposts
- New - Nuka World Endings Guide - Options and Benefits
- The Grand Tour
- Faction Perks and New SPECIAL Ranks in Nuka World
- Gage (Companion)
Fallout 4 Automatron: Gameplay After Mechanist
Rogue Robots Quest, Eyebot Scavengers, and the Mechanist's Lair
 The Mechanist's Lair in Fallout 4
After four pages on this and not wanting to post direct spoilers, I can now write more about the Automatron DLC without worrying about spoiling story for people. If you haven't finished the Mechanist Quests, don't read this if you care about spoilers. This is for people who have wrapped up the four Mechanist quests. Let's look at all the rewards you gain for completing the Mechanist story and this sweet new superhero hideout and technology we've inherited.
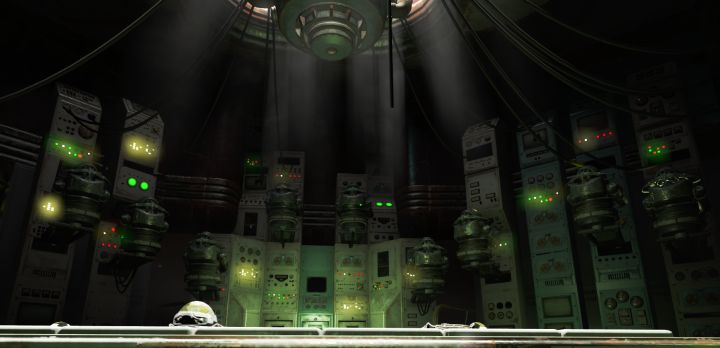
Your New Lair
 The Mechanist's Lair offers convenient fast travel similar to any other Settlement you own, with a convenient spawning point.
Mechanist's Lair
You can leave Mechanist's Lair a will, sort of like the Institute. You'll also appear in a convenient place when you go back to the base. Obviously you'll want to loot everything in this place and get it stored in your new workstation. The lair now counts as a Settlement, though it's not yet know if it needs defense in order to avoid attack. I doubt it based on its hidden nature.
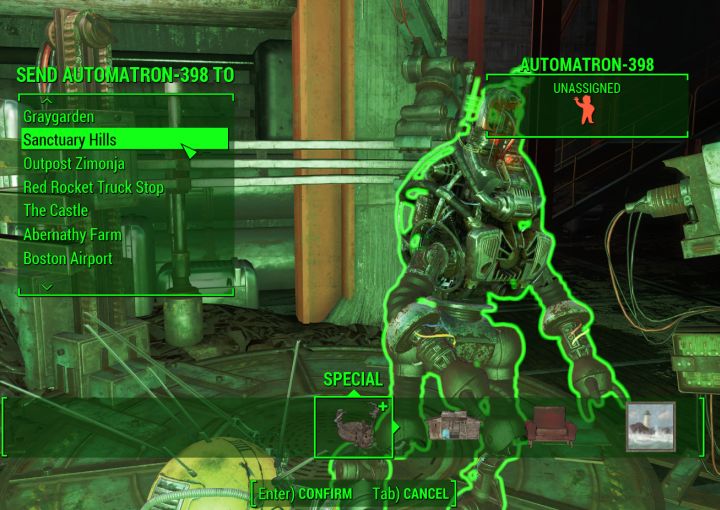 Automatrons can be used as robot workers for your Settlements, in order to set up supply lines, farm, or even defend. They don't need to sleep or eat, and can thus take over entire Settlements. Build your own twisted utopia.
In case some people don't realize it, I'll note that you can connect The Mechanist's Lair to your other Settlements by using Local Leader Rank 2. Just enter building mode, select a new automatron you've created, then hit the Supply Line button. Now you have access to be able to build in the Mechanist's lair, and will have storage shared between your other Settlements and the lair.
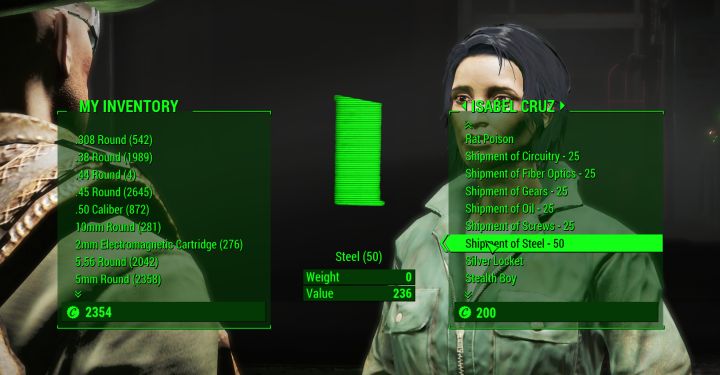 Isabel becomes a shopkeeper who can sell you shipments of materials you need to build Automatrons
Trading
Most of this is no different whether you let the Mechanist live or decided to kill them either out of a sense of justice or for your own enjoyment, aside from these two things: mechanist as a merchant, and the way Rogue Robots will work. Isabel Cruz becomes available as a merchant once you have taken over the Mechanist's Lair. She sells shipments of Circuitry, Fiber Optics, Gears, Oil, Screws, and Steel which all come in handy for making robots. This is hardly unique, but worth noting - the 'Trade' menu is not to give her gear.
Rogue Robots Quest (Radiant)
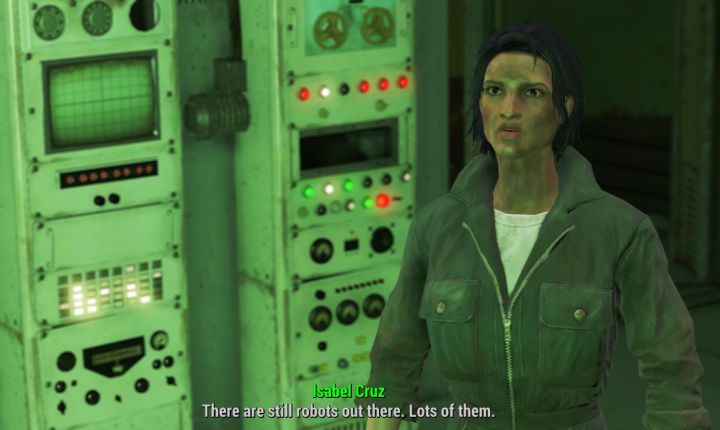 Isabel (or Ada) will offer you to repeat the Rogue Robots quest, which provides some great XP..
Rogue Robots has you hunting down robots in the Commonwealth, and it's a GREAT way to get experience to level up and be sent around to random areas where you may find new things. What differs is who gives it to you and how repeating it works. Isabel will give the quest to you if she's alive, but Ada will take her place if you've killed the Mechanist. The experience is granted in the field with either option, meaning you don't have to turn it in. This allows you to talk to Ada and get a new one, saving you a fast-travel back to the Mechanist's Lair.
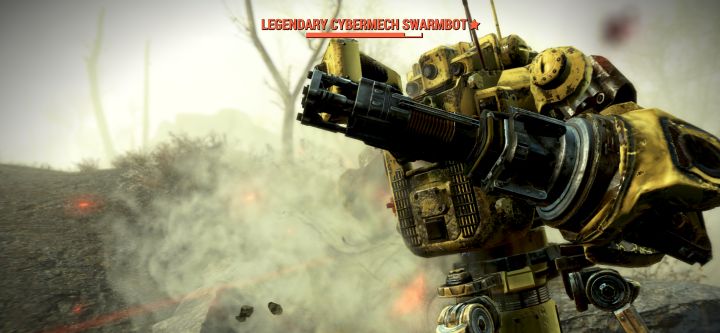 Rogue Robots also sometimes leads to Legendary enemies, and other great encounters that provide opportunities for rare drops. Experience is awarded as soon as you kill the rogue robot.
Isabel will become a bit more relieved after you've completed so many of these, as though the damage she caused has been undone. This, despite the fact that you can continue doing the Rogue Robots quest as long as you'd like - and I recommend it for leveling. The robots will scale with you, meaning that while you may run into low level raiders giving 7 XP and not really contributing much, you can fight robots that give 40-80+ instead, along with the completion bonus being awarded instantly.
Eyebots
 The Eyebot Pod Schematics are in Isabel's bedroom
Eyebot Schematics
After completing the quest and talking to Ada and/or the Mechanist, you should have all robot schematics and be able to make more advanced things, though you may still need Perks. One thing that could be overlooked is in the Mechanist's bedroom, along with a drawing of the mechanist on another table. The Eyebot Pod Schematics will let you make your own little eyebots, though they cannot be followers. You can only build them in Outdoor Settlements.
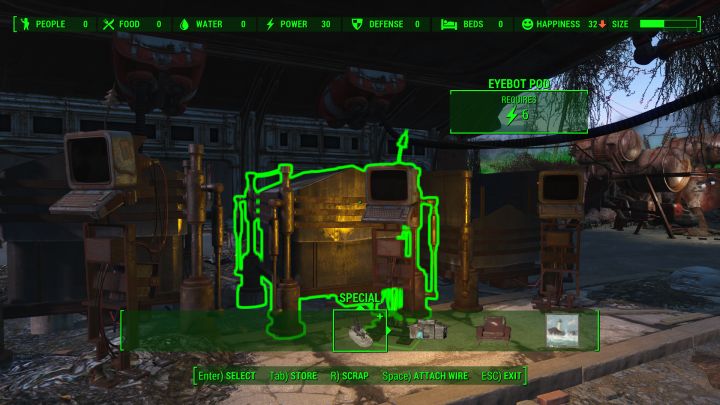 Eyebot Pods require power, but each will house one Eyebot which can be sent to locate materials, ammo, and explosives for you.
The way this works is, you go to an outdoor Settlement and can go to the Special menu in workshop mode. This lets you create the Eyebot Docking Station (takes 6 Power), which will control one Eyebot each. These little guys can be sent to search for items from one of three categories: ammo, explosives, or components. Most of the ones you'd want to be listed under components, like fiber optics and nuclear material, will be found there. Mini nukes are under ammo as they should be, and explosives include things like baseball grenades and cryo mines.
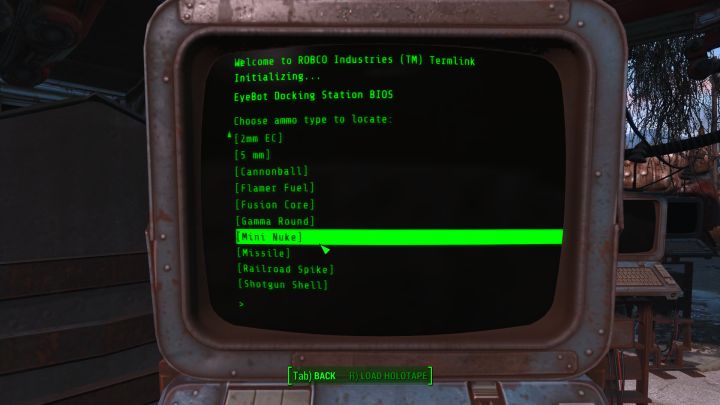 Pods must be built in outdoor Settlements, and you cannot have two Eyebots looking for the same thing (or so it seems).
Once the Eyebot is sent out to find it, you'll get a Quest under the Miscellaneous category 'Wait for Eyebot to find X' (whatever you sent it to find). When it finds it, you'll be notified then can use fast travel to get the item. Some players report some silly occurrences, but overall it adds one more thing to do and you'll likely be sent to uncleared areas - so therefore this can be used to get you to where the action is, and will lead to new discoveries. Overall, good stuff. If you don't like where the Eyebot has found it, say in the Glowing Sea or something, you can go to the terminal and recall the Eyebot.
The Eyebot station will have a red light when it's active. As stated, you can recall it or wait it out. I wasn't able to get two eyebots to look for the same object, so you should consider how many of these you really need. I went with 3 to start. You will be notified when to collect eyebot finds after game-time passes, not real time.
More Fallout 4 Guides
Share Tips and Strategies Below
- Raider Outposts in Nuka World
- Nuka World - Play as a Raider in this DLC
- Far Harbor - Learn about the DLC, its secrets, and read walkthroughs
- Automatron - Guides to building bots and quest walkthroughs
- Settlements - An in-depth guide to Settlements and managing them
- Melee Build - the best perks for a melee character
- Sneaking - Learn to be stealthy
- Critical Hits - Shots to Crit and Crit damage mechanics
- Tips for Making a Build - General advice for creating your own build
- Action Points - AP and all the things that affect it
- VATS - all about the V.A.T.S. and AP usage on weapons
- Gameplay Tips - pointers that will help new players
- Making a Sniper Rifle Weapon mod examples. Heavy hitter and fast-firing Comparison - two guns from the same base.
Share Tips and FAQs (10)
Join In